Welcome Back, Folks... !!!
Missing Data is one of the most unavoidable issues, and is always resting in our datasets peacefully waiting to destroy our final Machine Learning models. Thus, when it comes to making a Machine Learning model for our requirement, a majority of time is taken in Cleaning, Analysing and Preparing our Dataset for the final model.
We will be focusing here on Imputating Missing Data, which indeed is a difficult, manual & time killing job. In this regard, in our previous articles, we studied Imputation and its various techniques that can be used to ease our life. To avoid, or better to say reduce our time in Imputing the variables, there are few Python Libraries, that can be used to automate the Imputation task to some extend. We have already studied one such skLearn.SImpleImputer() in previous articles. Here, we will be focusing on a new library, Feature Engine.
What is Feature Engine?
Feature Engine is an open-source Python library, used for the purpose of Data Preprocessing in the field of Data Science and Machine Learning. It was taken from the word Feature Engineering, which means engineering, i.e. modifying/transforming old or creating new variables from the given dataset, with the sole motive of getting complete and interpretable data that can be used for Machine Learning.
Feature Engine comes with a bundle of features that are required in Preprocessing of data. Few things for which we can use the Feature Engine library are:-
1. Missing Data Imputation
2. Discretisation
3. Categorical Encoding
4. Outliers Handling
5. Variable Selection & transformation.
 |
| Features of Feature Engine |
The main thing that made us introduce this library is, this library is easy to use and Quick in providing results. We simply need few lines of code to perform any of the above actions using this library. Apart from this, like Machine Learning models, this library also uses 'fit' & 'transform' methods to perform the said action. That makes it more familiar for the user & helps in speeding the task.
Enough of the intro, let's jump ahead and learn how to use it.
Getting Ready
Unlike other libraries of python, we need to install this library for use.
1. Installation.
We can install this library directly using the 'pip' command.
## conda installation
conda install feature-engine
## pip installation
pip install feature-engine
## Jupyter Notebook installation
pip install feature-engine
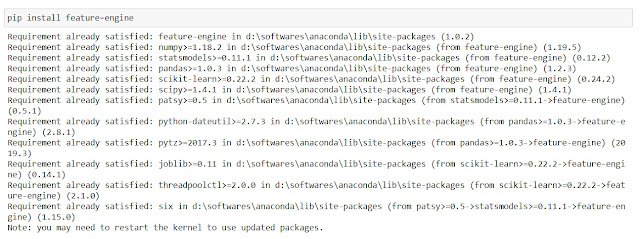 |
| Installing feature-engine |
We will be focusing only on the Imputation part of the library for this section & will cover all the code required for them.
So, without wasting much time let's begin the journey...
Mean/Median Imputation
A simple 2 step process to achieve the desired Mean or Median Imputation.
1. Importing the Libraries and Data
First, we need to import the MeanMedianImputer library from the feature_engine library.
 |
| Importing the Libraries and Data |
2. Performing Imputation
2a. Creating Object
Like any other programming language, we need to create the object(parameterised) of MeanMedianImputer before using it for further processing.
 |
| Creating MeanMedianImputer Object for Mean Imputation |
2b. Fitting the Data
The next step in this is to 'fit' the data to the Imputer. This step basically calculates the data to be imputed.
 |
| Fitting the Data |
2c. Verifying the Mean/Median
Once we have 'fit' the data to MeanMedianImputer, now we can check the values that are going to be used for imputing the variables.
 |
| Verifying the Mean |
2d. Transforming and Verifying
Lastly, we are required to use 'transform' and impute the data. And can verify if the imputation is performed correctly or not.
 |
| Transforming and Verifying |
Similarly, we can perform Imputation using 'Median'. We just need to change the imputation_method='median' while declaring the object.
 |
| Median Imputation using MeanMedianImputer |
Missing Indicator
1. Importing the Libraries and Data
Just like MeanMedianImputer, we need to import AddMissingIndicator from feature_engine.
 |
| Importing the Libraries and Data |
2. Adding Missing Indicators
This step remains the same as MeanMedianImputer, we need to create objects, fit & transform the data.
 |
| Adding Missing Indicators |
3. Verifying the data
Now, the last thing to do here is to verify the Imputation.
 |
| Verifying the data |
We can notice here, new variables were created (<VariableName>_na), signifying if the column is having missing data for a particular row or not (1- missing, 0- not missing).
Random Sample Imputation
1. Importing the Libraries and Data
 |
| Importing the Libraries and Data |
2. Imputing Random Samples
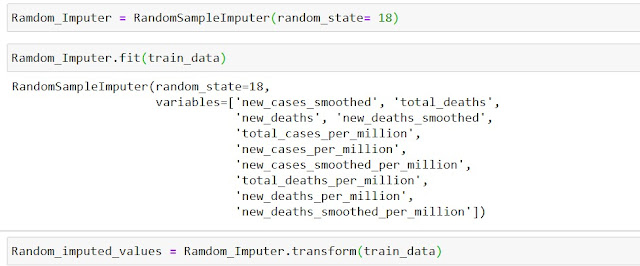 |
| Imputing Random Samples |
3. Verifying the data
 |
| Verifying the data |
Missing Category Imputation
1. Importing the Libraries and Data
 |
| Importing the Libraries and Data |
2. Imputing Categorical Variables
3. Verifying the data
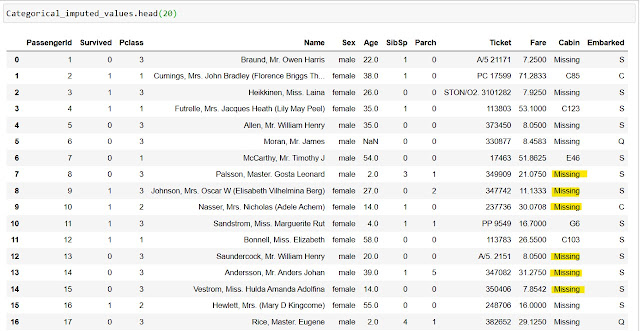 |
| Verifying the data |
Frequent Category Imputation
1. Importing the Libraries and Data
2. Imputing Frequent Categorical Variables
3. Verifying the data
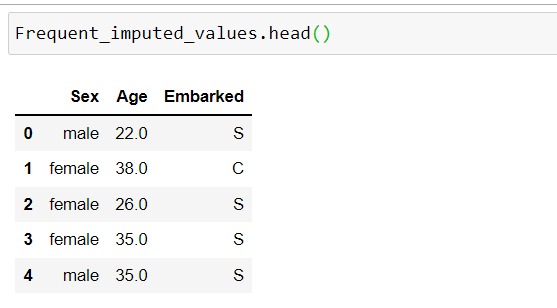 |
| Verifying the data |
End Tail Imputation
1. Importing the Libraries and Data
 |
| Importing the Libraries and Data |
2. Performing End Tail Imputation
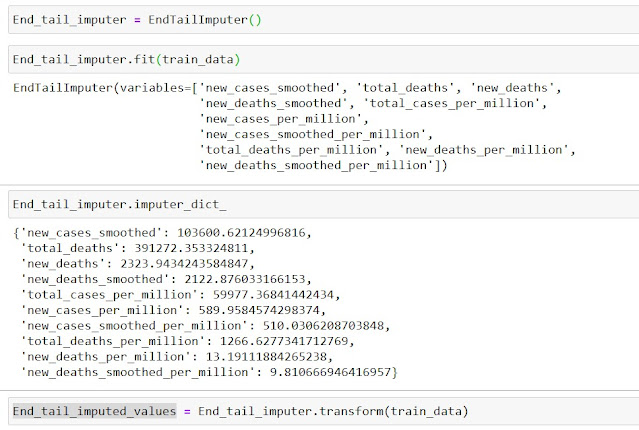 |
| Performing End Tail Imputation |
EndTailImputation also has a few parameters that can be used to control how the values are imputed.
3. Verifying Data
 |
| Verifying End of Tail Imputation |
Arbitrary Value Imputation
1. Importing the Libraries and Data
2. Performing Arbitrary Number Imputation
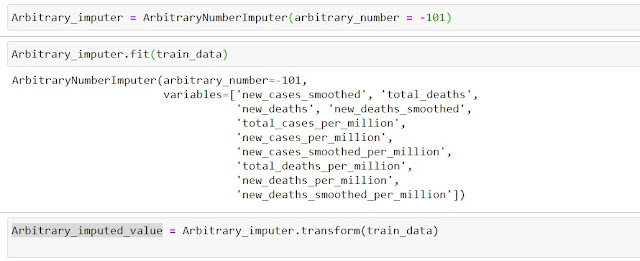 |
| Performing Arbitrary Number Imputation |
3. Verifying the Imputation
 |
Verifying the Imputation |


Comments
Post a Comment